 Try lt Free
 Recovery success rate of up to
Retrieving data from an old hard drive can be a complex but manageable process depending on the condition of the drive and the available resources. This guide will cover the different methods, tools, and techniques that can be used to recover data, step by step, and will also address troubleshooting tips, as well as best practices for preventing further damage to the drive. By the end, you should have a thorough understanding of how to extract data from an old hard drive.
1. Assessing the Condition of the Drive
Before attempting any data recovery process, it’s essential to determine the condition of the hard drive. There are generally two types of issues that could be present:
Logical Issues: The hard drive is functioning mechanically, but data loss has occurred due to file corruption, accidental deletion, or formatting.
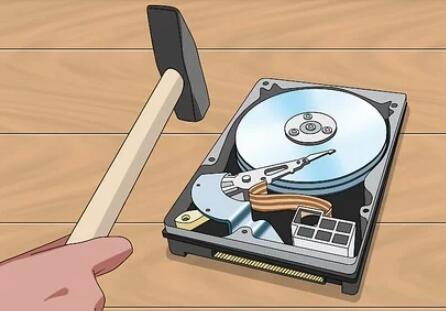
Physical Issues: The hard drive has mechanical failures, such as a broken read/write head, motor issues, or bad sectors.
The severity of the damage will determine the recovery methods you can use.
Signs of a Failing Hard Drive:
Clicking, grinding, or whirring noises indicate physical damage.
The drive is not recognized by the computer.
Slow access times or frequent freezing.
Blue screen of death (BSOD) when the drive is connected.
2. Tools and Preparation
You will need a few tools to get started:
Screwdrivers (if you need to open the drive, but only if it’s physically damaged).
External Hard Drive Enclosure or USB-to-SATA Adapter: These devices allow you to connect your old internal drive to another computer via USB.
Data Recovery Software: Tools like Panda Assistant, Recuva, EaseUS, or Stellar Data Recovery can help you retrieve lost files.
A Working Computer: You will need a secondary computer to access the old drive.
Tip:
Before doing anything, ensure that you have a large storage space (an external hard drive or cloud storage) available for recovered files.
3. Method 1: Connecting the Hard Drive Externally
If the old hard drive was from a desktop or laptop and it’s still functional, the easiest way to retrieve data is by connecting it to another computer.
Step-by-Step Guide:
Remove the Hard Drive:
If the hard drive is from a laptop or desktop that is no longer operational, carefully remove it. Most laptop hard drives are 2.5″ SATA drives, while desktop drives are 3.5″ SATA drives.
Connect via an Enclosure or Adapter:
Place the old hard drive into an external enclosure or use a USB-to-SATA adapter to connect it to another computer. Make sure the connection is secure.
Access the Drive:
Once connected, turn on the secondary computer. The old hard drive should appear as an external device.
If the drive is functioning correctly, you should be able to navigate through its file system and manually transfer the data to the new storage location.
4. Method 2: Using Data Recovery Software
If the drive is recognized by the computer but you cannot access the data due to corruption, accidental deletion, or formatting, data recovery software can help recover files.
Recommended Software:
Panda Assistant: Designed for recovering data from failing or corrupted hard drives. It is particularly effective for a wide range of file systems.
Recuva: Free software that can recover deleted files from damaged or formatted drives.
EaseUS Data Recovery: Easy to use, and it can recover files from RAW partitions and formatted drives.
Stellar Data Recovery: A powerful tool that supports the recovery of over 200 types of files.
Step-by-Step Guide:
Download and Install the Software:
Install the data recovery tool on a working computer. It’s crucial not to install it on the drive from which you are trying to recover data to avoid overwriting any data.
Launch the Software:
Open the software and select the drive you want to recover data from.
Scan the Drive:
Choose the type of scan. Most software offers a quick scan for recently deleted files and a deep scan for more thorough recovery.
Preview and Recover:
After the scan, preview the recoverable files. Most recovery tools allow you to filter by file type (e.g., photos, documents, videos).
Select the files you wish to recover and save them to a different storage device (not the old hard drive).
5. Method 3: Manual Recovery via File Explorer
For drives that are not physically damaged but have corrupted files, a simple manual approach may work. This involves using Windows File Explorer (or Mac Finder) to locate and transfer files.
Step-by-Step Guide:
Connect the Drive to Another Computer:
Use an external enclosure or USB-to-SATA adapter.
Open File Explorer/Finder:
Navigate to “This PC” on Windows or Finder on Mac and locate the old hard drive.
Copy Files:
Browse through the drive’s directory and manually copy important files to a new storage location.
6. Method 4: Boot from a Live USB
If the old hard drive has an operating system issue that prevents it from booting, but the drive itself is functional, you can create a Live USB to boot into a lightweight operating system and retrieve files.
Step-by-Step Guide:
Create a Live USB:
Download a lightweight Linux distribution (like Ubuntu) and create a bootable USB drive using software like Rufus.
Boot from USB:
Plug the Live USB into the computer with the old hard drive and boot from the USB. Access the BIOS to change the boot order if necessary.
Access the Hard Drive:
Once booted into Linux, you can mount the old hard drive and manually recover files.
7. Method 5: Professional Data Recovery Services
If none of the above methods work, or the drive is physically damaged, your last option is to use professional data recovery services. These services specialize in recovering data from physically damaged or severely corrupted drives.
Step-by-Step Guide:
Find a Reliable Data Recovery Service:
Services like Panda Assistant, DriveSavers, or Ontrack have expertise in recovering data from damaged drives.
Send Your Drive:
Contact the service provider, explain the issue, and follow their instructions on how to securely send your hard drive for recovery.
Wait for an Assessment:
Once the company assesses the damage, they will provide a quote and the likelihood of successful recovery. If you agree, they will attempt to retrieve the data.
8. Troubleshooting Common Issues
While recovering data from an old hard drive, you may encounter several issues:
Drive Not Detected:
Possible Causes:
Faulty cable or power supply.
Incorrect BIOS settings.
Drive failure.
Improper connection.
Solutions:
Try a different cable or port.
Ensure that the drive is properly connected and receiving power.
Enter the BIOS and ensure the drive is listed.
Use another computer to test if the drive is detected.
Clicking or Grinding Noises:
Possible Causes:
Mechanical failure (e.g., read/write head issue).
Solution:
Immediately disconnect the drive to prevent further damage.
Seek professional recovery services.
Corrupted Files:
Possible Causes:
Bad sectors, virus infection, or file system corruption.
Solutions:
Use data recovery software to attempt file retrieval.
Consider using a file system repair tool, like chkdsk on Windows.
9. Preventing Future Data Loss
To avoid data loss in the future, follow these best practices:
Regular Backups: Use external hard drives or cloud services to back up important data.
Monitor Hard Drive Health: Regularly check the health of your hard drives using tools like CrystalDiskInfo.
Use UPS for Power Protection: Power surges can damage hard drives. A UPS will provide a stable power supply to prevent this.
Replace Aging Drives: Hard drives have a limited lifespan. Replace old drives before they fail.
About us and this blog
Panda Assistant is built on the latest data recovery algorithms, ensuring that no file is too damaged, too lost, or too corrupted to be recovered.
Request a free quote
We believe that data recovery shouldn’t be a daunting task. That’s why we’ve designed Panda Assistant to be as easy to use as it is powerful. With a few clicks, you can initiate a scan, preview recoverable files, and restore your data all within a matter of minutes.
Subscribe to our newsletter!
More from our blog
See all posts


