Reformatting a video file involves changing its format, container, or codec to meet specific needs such as compatibility, file size, or quality. Here’s a detailed, step by step guide on how to reformat a video file.
Why Reformat a Video File?
There are several reasons you might need to reformat a video file, including:
Compatibility: You may have a video file in a format that is not supported by a particular device, video player, or platform. Reformatting can ensure the video can be played or edited on your target system.
File Size: Certain formats compress video data more efficiently than others, which can reduce file size. This can be important when uploading files to the web, sending them via email, or saving space on a device.
Quality: Reformatting can help adjust the quality of the video, either to reduce the quality (for smaller file sizes) or to enhance it (if the original format was not ideal).
Purpose-Specific Formats: Some formats are better suited for specific purposes, such as streaming, video editing, or DVD authoring.
Understanding Video Formats, Codecs, and Containers
Before diving into the actual steps of reformatting, it’s essential to understand the difference between video formats, codecs, and containers:
Format: This refers to the video file extension like .mp4. .avi, .mov, .mkv, etc. Each format has different properties.
Codec: A codec is responsible for encoding and decoding video data. Examples include H.264. H.265 (HEVC), VP9. etc.
Container: A container bundles together video, audio, subtitles, and other metadata into a single file. Common containers are MP4. MKV, and AVI.
Choosing the Right Format and Codec
Depending on your requirements, you should choose a format and codec carefully:
MP4 (H.264): Widely compatible, offering good quality and compression balance. It’s suitable for online streaming, playback on various devices, and even some professional editing.
MKV (H.265/HEVC): Ideal for high-quality video with superior compression. This is often used for HD and 4K video but may not be compatible with all devices.
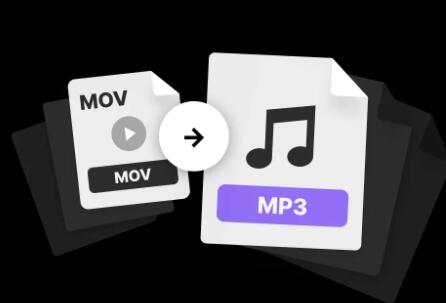
MOV: Commonly used in Apple environments, such as iPhone video recordings or Final Cut Pro.
AVI: An older format with large file sizes, mainly used for legacy systems or specific editing needs.
Step-by-Step Process for Reformatting a Video File
1. Choose a Video Reformatting Tool
There are several free and paid tools you can use to reformat video files. Here are some popular options:
HandBrake (free): An open-source video transcoder that supports a wide range of formats and codecs.
VLC Media Player (free): A versatile media player with built-in conversion features.
FFmpeg (free): A powerful command-line tool for handling video, audio, and other multimedia files.
Adobe Media Encoder (paid): Part of the Adobe suite, offering professional-grade video encoding tools.
Wondershare UniConverter (paid): A user-friendly tool for converting videos quickly and efficiently.
2. Install and Launch the Software
Download and install the chosen software. Below, I’ll cover the steps for three popular tools: HandBrake, VLC, and FFmpeg.
Reformatting with HandBrake
Open HandBrake: Launch the application and click on the “Open Source” button to import your video file.
Select Output Format: Choose the output container from the “Format” dropdown (e.g., MP4. MKV).
Select Preset or Customize Settings: HandBrake provides presets for various devices and platforms. You can either choose one or customize the settings. Set the video codec (e.g., H.264), quality, and resolution.
Choose Destination Folder: Select where you want the output video file to be saved.
Start Encoding: Once everything is set, click “Start Encode.” HandBrake will begin reformatting your video. Depending on the file size and settings, this may take a while.
Reformatting with VLC Media Player
Open VLC: Launch VLC and go to “Media” > “Convert/Save.”
Add Video File: Click “Add” to import the video file you want to reformat.
Select Convert/Save: Click the “Convert/Save” button at the bottom.
Choose Profile: In the “Convert” window, choose a profile that matches the desired output format (e.g., MP4. H.264).
Customize Settings: If you need to adjust video or audio settings, click on the wrench icon next to the selected profile.
Choose Destination: Set a file destination for the converted video.
Start Conversion: Click “Start” to begin the conversion process.
Reformatting with FFmpeg
FFmpeg is a command-line tool and provides more control over the reformatting process. Here are the basic steps:
Install FFmpeg: Follow installation instructions for your operating system (Windows, macOS, or Linux).
Open Terminal or Command Prompt: Navigate to the folder containing your video file.
Run the FFmpeg Command: Use the following syntax to convert the video:
r
复制代码
ffmpeg -i inputfile.mp4 -c:v libx264 -c:a aac outputfile.mp4
This command will convert the video to MP4 with H.264 video and AAC audio. You can replace the codec and format according to your needs.
Check the Output: Once FFmpeg has finished processing, check the newly formatted video file in the output folder.
3. Adjusting Video Settings (Resolution, Bitrate, and Frame Rate)
When reformatting video files, you may want to adjust additional settings:
Resolution: This refers to the dimensions of the video (e.g., 1920×1080 for Full HD). Lowering the resolution can reduce the file size but will affect the quality.
Bitrate: Bitrate controls the amount of data encoded per second of video. Higher bitrates result in better quality but larger file sizes. Lowering the bitrate can help reduce file size.
Frame Rate: Most videos are recorded at 24. 30. or 60 frames per second (fps). You can change the frame rate during reformatting if needed. Reducing the frame rate can save file size but might cause the video to look choppy.
4. Audio Considerations
During the reformatting process, you may also want to adjust the audio settings:
Audio Codec: Common audio codecs include AAC, MP3. and AC3. If compatibility is important, AAC is generally a safe choice for MP4 files.
Bitrate and Channels: Similar to video, you can adjust the audio bitrate. Lowering it can reduce file size, though it may affect quality. You can also choose between stereo (2 channels) or surround sound (5.1 channels).
5. Saving and Verifying the Reformatted Video
Once the reformatting process is complete, play the output file to ensure it meets your requirements. Check for:
Compatibility: Try playing the file on different devices or players to ensure it works everywhere needed.
Quality: Review both the video and audio quality to make sure it meets your expectations.
File Size: Ensure that the file size is appropriate for your storage or sharing needs.
Common Problems and Troubleshooting
Corrupted Video Files: If the video file becomes corrupted during reformatting, try using another tool or adjusting the settings (such as lowering the bitrate or resolution).
Audio/Video Sync Issues: This can happen if the frame rate or audio sampling rate isn’t properly configured. Adjust these settings in the tool you’re using.
Quality Loss: Repeated reformatting can lead to quality loss. If possible, start with the original, high-quality file and avoid unnecessary conversions.
Best Practices for Reformatting Video Files
Always Backup the Original: Before reformatting, save a copy of the original file in case something goes wrong.
Choose the Right Format for Your Needs: If you’re unsure which format to use, MP4 with H.264 is a safe default that works on most devices and platforms.
Use a Reliable Tool: While free tools like HandBrake and VLC are powerful, sometimes professional-grade software may be necessary for complex tasks.
Monitor File Size: If you’re reformatting to reduce file size, try adjusting the bitrate, resolution, and codec. However, be careful not to lower the quality too much.
Test on Multiple Devices: Especially when reformatting for distribution or publishing, make sure your video works on various devices, operating systems, and browsers.
About us and this blog
Panda Assistant is built on the latest data recovery algorithms, ensuring that no file is too damaged, too lost, or too corrupted to be recovered.
Request a free quote
We believe that data recovery shouldn’t be a daunting task. That’s why we’ve designed Panda Assistant to be as easy to use as it is powerful. With a few clicks, you can initiate a scan, preview recoverable files, and restore your data all within a matter of minutes.
Subscribe to our newsletter!
More from our blog
See all postsRecent Posts
- How to recover accidentally deleted files 2025-07-01
- How do i recover a file i accidentally deleted 2025-07-01
- How to recover an accidentally deleted file 2025-07-01

 Try lt Free
 Recovery success rate of up to

