 Try lt Free
 Recovery success rate of up to
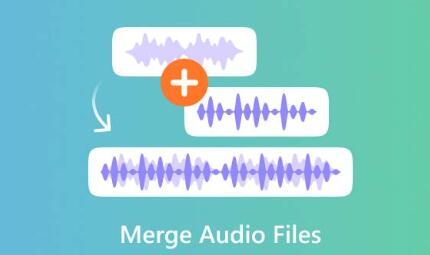
Combining multiple audio files into one can be accomplished using a variety of methods and tools, depending on your preferences and the complexity of your project.
1. Choosing the Right Tool
Several tools can help you merge audio files. Here are a few popular options:
Audacity (Free, Open-Source)
Adobe Audition (Paid, Professional)
GarageBand (Mac, Free)
Online Services (e.g., Audio Joiner, Clideo)
2. Using Audacity
Audacity is a powerful and free audio editor. Follow these steps to combine audio files using Audacity:
Download and Install Audacity
Visit the Audacity website to download and install the software for your operating system.
Import Audio Files
Open Audacity.
Go to File > Import > Audio and select the files you want to combine. Audacity will import them as separate tracks.
Align Tracks
Use the Time Shift Tool (double-headed arrow icon) to move the audio clips around on the timeline. Place them in the desired order.
Adjust Volume Levels
If necessary, adjust the volume of each track to ensure a consistent sound level across the entire file. You can use the Amplify or Normalize effects under the Effect menu.
Mix and Export
Once you’re satisfied with the arrangement, go to Tracks > Mix > Mix and Render. This will combine all the tracks into a single track.
Export the combined audio by going to File > Export and choose your desired format (e.g., MP3. WAV).
3. Using Adobe Audition
Adobe Audition is a professional audio editing software with more advanced features. Here’s how to use it:
Open Adobe Audition
Launch Adobe Audition and open a new multi-track session by going to File > New > Multitrack Session.
Import Audio Files
Drag and drop your audio files into the multitrack session or use File > Import to add them.
Arrange Files
Drag the audio files onto the timeline in the desired order. You can use the Selection Tool to move and adjust the position of each file.
Apply Crossfades (Optional)
If you want smooth transitions between files, you can apply crossfades. Overlap the edges of two clips slightly, and Adobe Audition will create a fade effect automatically.
Mix Down
Once you’ve arranged the files, go to Multitrack > Mixdown > Entire Session. This will render all the tracks into a single audio file.
Export
Go to File > Export > Export as File to save your combined audio in the desired format.
4. Using GarageBand (Mac)
GarageBand is a user-friendly option for Mac users:
Open GarageBand
Launch GarageBand and create a new project.
Import Audio Files
Drag and drop your audio files into the GarageBand workspace. Each file will appear as a separate track.
Arrange Files
Move the audio files around on the timeline to arrange them as needed. GarageBand allows you to easily drag and drop files to adjust their position.
Adjust Audio Levels
Use the track volume controls to balance the audio levels of each track.
Export
Once you’re satisfied with the arrangement, go to Share > Export Song to Disk and choose your preferred format.
5. Using Online Services
For a quick and easy solution, online audio joiner tools can be useful. Here’s how to use one:
Choose an Online Tool
Go to an audio joining website like Audio Joiner or Clideo.
Upload Audio Files
Upload the audio files you want to combine. Most tools allow you to drag and drop files directly onto the webpage.
Arrange and Merge
Arrange the order of the files if the tool allows. Follow the instructions to merge the files. Some tools offer basic editing features like volume adjustment.
Download the Combined File
After the merge process is complete, download the combined audio file to your computer.
6. Tips for a Smooth Process
Check Formats: Ensure all your audio files are in compatible formats before combining them. Most tools support common formats like MP3 and WAV.
Save Regularly: When working on audio projects, save your work frequently to avoid losing progress.
Use High-Quality Files: To maintain audio quality, use high-quality source files.
About us and this blog
Panda Assistant is built on the latest data recovery algorithms, ensuring that no file is too damaged, too lost, or too corrupted to be recovered.
Request a free quote
We believe that data recovery shouldn’t be a daunting task. That’s why we’ve designed Panda Assistant to be as easy to use as it is powerful. With a few clicks, you can initiate a scan, preview recoverable files, and restore your data all within a matter of minutes.
Subscribe to our newsletter!
More from our blog
See all posts


Recent Posts
- Data recovery salt lake city utah 2025-04-18
- Data recovery sacramento 2025-04-18
- Data recovery miami 2025-04-18