3D printing has become a widely accessible and popular technology, allowing individuals and businesses to create complex objects with ease. One of the essential steps in the 3D printing process is transferring your design files to the 3D printer, often done via an SD card.
1. 3D Print Files
Before we dive into the process, it’s important to understand the types of files you’ll be working with:
STL Files: The most common format used in 3D printing, which contains information about the 3D model’s geometry.
G-code Files: These are the instructions that the 3D printer follows to create the object. They are generated from STL files using slicing software.
For most 3D printers, you’ll be transferring G-code files to the SD card, as they contain the specific instructions your printer needs.
2. Preparing Your 3D Print Files
a. Design Your Model
If you’re creating your own 3D model, you’ll start with design software such as:
Tinkercad: A beginner-friendly online tool.
Fusion 360 or Blender: More advanced software for complex designs.
After designing, export your model as an STL file. If you’re downloading a model, websites like Thingiverse provide pre-made STL files ready for printing.
b. Slicing Your Model
Slicing is the process of converting your STL file into a G-code file that the 3D printer can read. Here’s how to do it:
Choose Slicing Software: Popular options include Cura, PrusaSlicer, and Simplify3D.
Load the STL File: Open the STL file in the slicing software.
Configure Print Settings: Adjust parameters like layer height, print speed, infill density, and support structures based on your printer and material.
Generate G-code: Once settings are configured, slice the model to generate the G-code file.
c. Naming the File
Make sure your G-code file has a simple and recognizable name, as some 3D printers have limitations on file name length or character types.
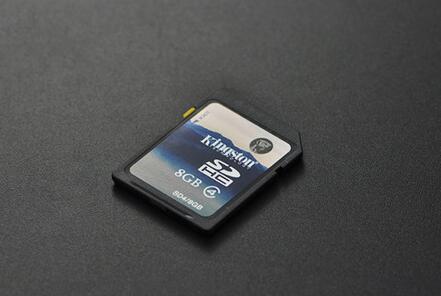
3. Preparing the SD Card
a. Choosing the Right SD Card
Capacity: Most 3D printers support SD cards up to 32GB. Larger capacities might not be recognized.
Speed: A Class 10 SD card is usually sufficient for 3D printing needs.
b. Formatting the SD Card
It’s important to format the SD card to ensure compatibility and prevent file corruption:
Insert the SD Card into Your Computer: Use an SD card slot or a USB adapter.
Format the Card:
Windows: Open ‘File Explorer,’ right-click on the SD card, and select ‘Format.’ Choose ‘FAT32’ as the file system and ensure ‘Quick Format’ is selected.
Mac: Open ‘Disk Utility,’ select the SD card, click ‘Erase,’ and choose ‘MS-DOS (FAT)’ as the format.
Linux: Use the mkfs command to format the SD card to FAT32.
c. Safely Eject the SD Card
After formatting, safely eject the SD card to avoid corrupting it.
4. Transferring Files to the SD Card
a. Connect the SD Card to Your Computer
Use an SD card reader if your computer doesn’t have a built-in SD card slot.
b. Transfer the G-code File
Locate the G-code File: Navigate to the folder where your G-code file is saved.
Drag and Drop: Simply drag and drop the G-code file onto the SD card.
Organize Files: If you’re managing multiple files, consider organizing them into folders, but be aware that some 3D printers might not support nested directories.
c. Safely Eject the SD Card
After transferring the file(s), make sure to safely eject the SD card from your computer:
Windows: Right-click the SD card icon in ‘File Explorer’ and select ‘Eject.’
Mac: Drag the SD card icon to the trash can, which will turn into an eject symbol.
Linux: Use the umount command to unmount the SD card.
5. Inserting the SD Card into the 3D Printer
Once the SD card is ready, insert it into the SD card slot on your 3D printer. Make sure it’s properly seated, as an improperly inserted card might not be recognized.
6. Selecting and Starting the Print
On your 3D printer’s interface:
Navigate to the File Menu: Access the menu where you can select files from the SD card.
Select Your File: Find and select the G-code file you transferred. The file name should appear as it was saved.
Start the Print: Confirm the selection to begin printing.
7. Troubleshooting Common Issues
a. SD Card Not Recognized
If your printer doesn’t recognize the SD card:
Check Format: Ensure the card is formatted to FAT32.
Reinsert the Card: Try removing and reinserting the SD card.
Check File Names: Ensure that the file names are not too long or contain unsupported characters.
b. Corrupted Files
If the printer displays a file error:
Reformat the SD Card: Backup important files and reformat the SD card.
Transfer Files Again: Re-slice the model and transfer the G-code file again.
c. Slow File Loading
If the file takes a long time to load:
Use a Faster SD Card: Switch to a higher-speed SD card (Class 10 or higher).
Simplify the Model: Reduce the complexity of the 3D model or adjust slicing settings.
8. Optimizing Your Workflow
a. Keeping Files Organized
Folder Structure: Create a consistent folder structure for different projects or models.
File Naming Conventions: Use clear and consistent naming conventions for your G-code files.
b. Regularly Back Up Files
Cloud Storage: Consider backing up important 3D models and G-code files to cloud storage services like Google Drive or Dropbox.
External Hard Drives: Keep an external hard drive dedicated to storing 3D print files.
c. Updating Firmware
Ensure your 3D printer’s firmware is up to date, as updates might improve SD card compatibility and file handling.
9. Advanced Tips
a. Using Wi-Fi SD Cards
Wi-Fi-enabled SD cards allow you to transfer files wirelessly, eliminating the need to remove the card from the printer. However, they may require specific printer compatibility and additional setup.
b. Automating File Transfer
For advanced users, scripts can be written to automatically transfer and organize files on the SD card when connected to your computer.
c. Batch Printing
If you’re printing multiple objects, organize and batch your G-code files to optimize print time and reduce manual file transfers.
Transferring 3D print files to an SD card is a critical step in the 3D printing process. By understanding the types of files involved, properly preparing and formatting your SD card, and following best practices for file transfer, you can ensure a smooth and efficient workflow. Troubleshooting common issues and optimizing your setup will further enhance your 3D printing experience, allowing you to focus on creating high-quality prints. Whether you’re a beginner or an advanced user, these steps will help you get the most out of your 3D printer.
About us and this blog
Panda Assistant is built on the latest data recovery algorithms, ensuring that no file is too damaged, too lost, or too corrupted to be recovered.
Request a free quote
We believe that data recovery shouldn’t be a daunting task. That’s why we’ve designed Panda Assistant to be as easy to use as it is powerful. With a few clicks, you can initiate a scan, preview recoverable files, and restore your data all within a matter of minutes.
Subscribe to our newsletter!
More from our blog
See all posts


Recent Posts
- How to recover lost files on flash drive? 2024-12-26
- What can messed up flash drive cybersecurity? 2024-12-26
- My flash drive isn’t working on adaptor mac 2024-12-26