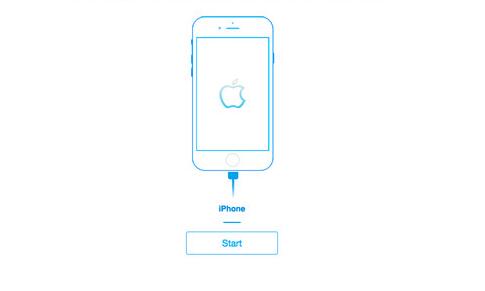
From cherished memories captured in photos to important documents and messages, the data stored on our iPhones and iPads is invaluable. However, data loss can occur unexpectedly due to various reasons such as accidental deletion, software updates, device crashes, or even physical damage. When such unfortunate events happen, knowing how to recover your data from an iOS device becomes crucial.
1. Common Causes of Data Loss on iOS Devices
Understanding the reasons behind data loss is the first step in effectively recovering your data. Here are some common scenarios:
Accidental Deletion: One of the most frequent causes of data loss is accidentally deleting files, photos, or messages.
iOS Updates: Sometimes, updating your iPhone or iPad to the latest iOS version can lead to data loss, especially if the update fails or encounters errors.
Jailbreaking: Jailbreaking an iOS device can offer more control over your device but can also lead to instability and data loss.
Device Crashes or Freezing: Software bugs or hardware malfunctions can cause your device to crash or freeze, potentially resulting in lost data.
Physical Damage: Dropping your device or exposing it to water or extreme temperatures can damage the hardware and make data inaccessible.
Factory Reset: Performing a factory reset without a proper backup can erase all your data.

2. Pre-recovery Steps
Before diving into recovery methods, take these initial steps:
Stop Using the Device: To avoid overwriting the deleted data, stop using your iOS device immediately after noticing data loss. Continuous use could overwrite the data, making recovery more challenging.
Check Recently Deleted Folder: Photos, videos, and other files deleted from your iOS device might still be in the “Recently Deleted” folder, where they are stored for 30 days before being permanently deleted.
Backup Your Device: If possible, create a backup of your current data. This ensures that even if recovery efforts fail, you won’t lose any additional data.
3. Recovery Methods
A. Recovering Data from iCloud Backup
iCloud provides a convenient way to recover lost data if you have a recent backup. Here’s how:
Erase Your iOS Device: Go to Settings > General > Reset, then tap on Erase All Content and Settings. This will erase all data on your device.
Set Up Your Device: After your device restarts, follow the setup instructions. When you reach the “Apps & Data” screen, select “Restore from iCloud Backup.”
Choose Backup: Sign in to iCloud with your Apple ID and choose the most recent backup that contains your lost data.
Restore Data: Wait for the restoration process to complete. Ensure your device stays connected to Wi-Fi to avoid interruptions.
Limitations:
You must have a recent iCloud backup.
Restoring from iCloud backup will overwrite your current data.
Not all data types may be included in the backup.
B. Recovering Data from iTunes/Finder Backup
If you’ve backed up your iOS device to iTunes (or Finder on macOS Catalina and later), you can restore data from there:
Connect Your Device: Use a USB cable to connect your iPhone or iPad to your computer.
Open iTunes/Finder: Open iTunes (or Finder) and select your device.
Restore Backup: In the “Summary” or “General” tab, click on “Restore Backup” and choose the backup file that contains your lost data.
Complete the Restoration: Wait for the process to finish and do not disconnect your device until it’s done.
Limitations:
Similar to iCloud, this method will overwrite current data.
Requires a backup on your computer.
C. Recovering Data Without Backup
If you don’t have a backup, you can use third-party data recovery software designed to recover data directly from your iOS device.
1. Using Panda Assistant
Panda Assistant is a powerful data recovery tool specifically designed for iOS devices. Here’s how to use it:
Download and Install: Download and install Panda Assistant on your computer.
Connect Your Device: Connect your iPhone or iPad to your computer via a USB cable.
Launch the Software: Open Panda Assistant and select the “Recover from iOS Device” option.
Scan Your Device: Click on “Start Scan” to begin scanning your device for lost data.
Preview and Recover: After the scan is complete, preview the recoverable files, select the ones you need, and click “Recover” to save them to your computer.
Advantages:
Recovers data directly from the device without requiring a backup.
Supports a wide range of data types including photos, messages, contacts, and more.
Easy-to-use interface.
Limitations:
Not all data may be recoverable, depending on how much time has passed since the data was lost.
Some advanced features may require a paid version.
2. Other Third-Party Tools
In addition to Panda Assistant, several other third-party tools can help recover data from iOS devices:
Dr.Fone: Another popular tool for iOS data recovery that offers similar functionality to Panda Assistant.
iMobie PhoneRescue: Focuses on recovering data directly from iOS devices, iTunes, and iCloud backups.
EaseUS MobiSaver: Offers both free and paid versions, capable of recovering a wide range of data types.
4. Recovering Data from a Broken or Unresponsive Device
If your iOS device is physically damaged or unresponsive, data recovery becomes more complex. However, some methods can still be applied:
Use Panda Assistant: Panda Assistant can sometimes recover data from a broken device by connecting it to a computer and using the software’s recovery options.
Professional Data Recovery Services: If your device is severely damaged, you may need to turn to professional data recovery services. These services often involve opening the device and extracting data directly from the internal storage.
iCloud Recovery: If your device was set to back up to iCloud, you could still recover your data by restoring it to a new device from your iCloud backup.
5. Preventive Measures
To avoid the stress and potential loss associated with data recovery, consider the following preventive measures:
Regular Backups: Make regular backups to iCloud or your computer using iTunes/Finder. Enable automatic iCloud backups to ensure your data is always safe.
Use Cloud Storage: Consider using cloud storage services like Google Drive, Dropbox, or OneDrive to automatically back up important files, photos, and documents.
Enable Two-Factor Authentication: This adds an extra layer of security to your Apple ID, reducing the risk of unauthorized access and potential data loss.
Be Cautious with Updates: Before updating your iOS, ensure you have a recent backup. Updates can sometimes cause data loss if something goes wrong.
Avoid Jailbreaking: Jailbreaking your device increases the risk of instability and data loss. If you do jailbreak, make sure to back up your data regularly.
Data recovery from iOS devices can be a daunting task, but with the right tools and knowledge, you can recover lost files, photos, messages, and more. Whether you rely on iCloud, iTunes, or a third-party recovery tool like Panda Assistant, having a clear understanding of the process will increase your chances of successfully retrieving your data.
Moreover, taking preventive measures like regular backups and careful handling of your device can save you from the frustration of data loss in the future. While data recovery is often possible, prevention is always better than cure. By following the tips and methods outlined in this guide, you can protect your valuable data and ensure it’s always within reach, even in the face of unexpected loss.
About us and this blog
Panda Assistant is built on the latest data recovery algorithms, ensuring that no file is too damaged, too lost, or too corrupted to be recovered.
Request a free quote
We believe that data recovery shouldn’t be a daunting task. That’s why we’ve designed Panda Assistant to be as easy to use as it is powerful. With a few clicks, you can initiate a scan, preview recoverable files, and restore your data all within a matter of minutes.
Subscribe to our newsletter!
More from our blog
See all postsRecent Posts
- How to save tiktok videos on computer 2025-04-30
- How to watch gopro videos on computer 2025-04-30
- How to save video from blink video doorbell to computer? 2025-04-30

 Try lt Free
 Recovery success rate of up to


