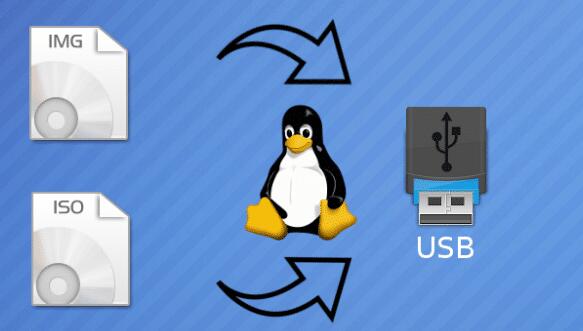
1. Introduction to Image Files and USB Bootable Drives
An image file, typically an ISO, is a complete copy of data from a CD, DVD, or another storage device. These files are essential for creating bootable USB drives, especially for installing operating systems, running live environments, or creating rescue disks.
A bootable USB drive allows your computer to load an operating system or other software directly from the USB, bypassing the need for a traditional optical disc. This is especially useful for modern devices that lack optical drives.
Common use cases for writing an image file to a USB drive include installing a new operating system (Windows, Linux), creating a rescue disk, or running a live environment without installing the OS on your hard drive.

2. Prerequisites and Preparations
Required Tools and Software:
A Windows PC
A USB drive with at least 4GB of storage (size depends on the image file)
Image file (ISO, IMG, etc.)
Software like Rufus, Win32 Disk Imager, or Etcher
Choosing the Right USB Drive: Ensure that the USB drive you choose is large enough to accommodate the image file. Most modern USB drives should be fast enough, but choosing a USB 3.0 drive can significantly reduce the time it takes to write the image.
Backup Your Data: Writing an image file to a USB drive will erase all existing data on the drive. Ensure that any important data is backed up before proceeding.
3. Method 1: Using Windows Built-in Tool
Preparing the USB Drive:
Insert the USB drive into your computer.
Open ‘File Explorer’, right-click on the USB drive, and select ‘Format’.
Choose the file system (usually FAT32 for compatibility) and click ‘Start’. Formatting will erase all data on the USB drive.
Writing the Image File:
Download the image file you want to write (e.g., a Windows ISO).
Right-click on the ISO file and select ‘Mount’. This creates a virtual drive with the contents of the ISO.
Open ‘File Explorer’, navigate to the virtual drive, and copy all the files.
Paste the files directly onto the formatted USB drive.
This method works well for Windows installation ISOs but may not be compatible with all types of image files.
4. Method 2: Using Rufus
What is Rufus? Rufus is a free and open-source tool specifically designed for creating bootable USB drives from image files.
Step-by-Step Guide to Using Rufus:
Download Rufus from its official website.
Insert the USB drive and open Rufus.
In the ‘Device’ dropdown, select your USB drive.
Click ‘Select’ next to ‘Boot selection’ and choose the ISO file.
Ensure the ‘Partition scheme’ is correct for your system (MBR for older systems, GPT for newer).
Click ‘Start’ to begin the process. Rufus will warn you that all data on the USB drive will be erased.
Once complete, close Rufus and safely eject your USB drive.
Rufus is particularly useful for creating bootable drives for various operating systems, including Windows, Linux, and more.
5. Method 3: Using Win32 Disk Imager
What is Win32 Disk Imager? Win32 Disk Imager is a tool primarily used to write raw disk images to USB drives or SD cards, commonly used for Raspberry Pi setups.
Step-by-Step Guide to Using Win32 Disk Imager:
Download and install Win32 Disk Imager.
Insert the USB drive and open Win32 Disk Imager.
Select the image file (ISO, IMG, etc.) by clicking the folder icon.
Choose the correct drive letter for your USB.
Click ‘Write’ to start the process. A confirmation prompt will appear; click ‘Yes’.
Once the process is complete, close the program and safely eject your USB drive.
Win32 Disk Imager is particularly well-suited for writing raw disk images that aren’t in the ISO format.
6. Method 4: Using Etcher
What is Etcher? Etcher is a cross-platform tool that simplifies the process of writing image files to USB drives. It is known for its user-friendly interface and reliability.
Step-by-Step Guide to Using Etcher:
Download Etcher from its official website and install it.
Insert the USB drive and open Etcher.
Click ‘Flash from file’ and select your image file.
Select the USB drive as the target.
Click ‘Flash!’ to start the process. Etcher will automatically unmount the USB drive when done.
Safely eject the USB drive once the flashing process is complete.
Etcher is a versatile tool that works on Windows, macOS, and Linux, making it a great option for cross-platform needs.
7. Verifying the USB Drive
Ensuring the Image was Written Correctly: After writing the image file to the USB drive, it’s essential to verify that the process was successful. The simplest way to do this is to boot from the USB drive. Insert the USB drive into the target computer, restart, and enter the boot menu (usually by pressing a key like F12. Esc, or Del during startup). If the system boots from the USB, the process was successful.
Troubleshooting Common Issues:
USB Drive Not Booting: Ensure the BIOS/UEFI settings are configured to boot from USB.
Corrupt Image File: Verify the integrity of the image file by checking its hash.
Drive Not Recognized: Try using a different USB port or ensure the USB drive is functioning correctly.
About us and this blog
Panda Assistant is built on the latest data recovery algorithms, ensuring that no file is too damaged, too lost, or too corrupted to be recovered.
Request a free quote
We believe that data recovery shouldn’t be a daunting task. That’s why we’ve designed Panda Assistant to be as easy to use as it is powerful. With a few clicks, you can initiate a scan, preview recoverable files, and restore your data all within a matter of minutes.
Subscribe to our newsletter!
More from our blog
See all postsRecent Posts
- Data recovery salt lake city utah 2025-04-18
- Data recovery sacramento 2025-04-18
- Data recovery miami 2025-04-18

 Try lt Free
 Recovery success rate of up to


