 Try lt Free
 Recovery success rate of up to
To create a comprehensive guide on formatting a Stealth Cam card, you’ll want to cover several key areas:
1. Introduction
Purpose of Formatting: Explain why formatting a memory card is essential, such as clearing old data, ensuring the card is ready for new recordings, or fixing errors.
Importance of Regular Formatting: Discuss how regular formatting can help maintain the performance of the card and avoid potential issues.
2. Understanding Your Stealth Cam
Overview of Stealth Cam Models: Provide a brief description of various Stealth Cam models, highlighting features relevant to memory card usage.
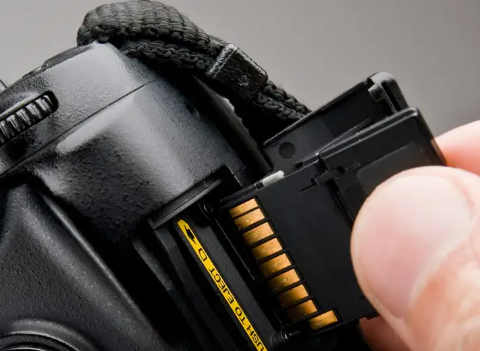
Memory Card Specifications: Detail the types of memory cards compatible with Stealth Cam devices (e.g., SD, SDHC, SDXC) and their recommended specifications.
3. Preparing for Formatting
Backup Data: Advise on how to back up any important data from the card before formatting, as formatting will erase all existing data.
Power Supply: Ensure the camera or device has a sufficient power supply to avoid interruptions during the formatting process.
4. Formatting the Card in a Stealth Cam
Step-by-Step Instructions:
Turn On the Camera: Power up your Stealth Cam and navigate to the menu settings.
Access the Format Option: Locate the formatting option in the settings menu. This is typically found under ‘Setup’ or ‘Storage’ settings.
Select the Memory Card: Choose the card you wish to format from the list if the device supports multiple cards.
Confirm Formatting: Follow the prompts to confirm the formatting process. This may include a warning message indicating that all data will be erased.
Wait for Completion: Allow the camera to complete the formatting process. This can take a few minutes depending on the card’s size.
5. Formatting the Card Using a Computer
For Windows Users:
Insert the Card: Place the card into an SD card reader connected to your computer.
Open File Explorer: Locate the card under ‘This PC’ or ‘My Computer’.
Right-Click and Format: Right-click on the card and select ‘Format’. Choose the file system (e.g., FAT32) and click ‘Start’.
For Mac Users:
Insert the Card: Connect the card using an SD card reader.
Open Disk Utility: Find it in the Applications > Utilities folder.
Select and Erase: Choose the card from the list and click ‘Erase’. Choose the appropriate format and click ‘Erase’ again.
6. Troubleshooting Common Issues
Card Not Recognized: Discuss possible reasons and solutions if the card isn’t recognized by the camera or computer.
Formatting Errors: Provide solutions for common errors encountered during formatting.
7. Best Practices
Regular Maintenance: Suggest a routine for formatting and checking the health of the memory card.
Safe Removal: Advise on the correct way to remove the card from the camera or computer to prevent data corruption.
8. Conclusion
Summary of Key Points: Recap the importance of formatting and the steps involved.
Additional Resources: Provide links or references for further reading or support.
About us and this blog
Panda Assistant is built on the latest data recovery algorithms, ensuring that no file is too damaged, too lost, or too corrupted to be recovered.
Request a free quote
We believe that data recovery shouldn’t be a daunting task. That’s why we’ve designed Panda Assistant to be as easy to use as it is powerful. With a few clicks, you can initiate a scan, preview recoverable files, and restore your data all within a matter of minutes.
Subscribe to our newsletter!
More from our blog
See all posts


Recent Posts
- Data recovery salt lake city utah 2025-04-18
- Data recovery sacramento 2025-04-18
- Data recovery miami 2025-04-18