 Try lt Free
 Recovery success rate of up to
If your deleted files aren’t going to the Recycle Bin in Windows 10. this might be due to various reasons, including settings misconfigurations, disk space issues, or system errors.
1.Windows 10 中的回收站
The Recycle Bin is a crucial feature in Windows operating systems that temporarily stores deleted files and folders. This allows users to restore files if they were deleted by mistake. However, there are situations where deleted files bypass the Recycle Bin entirely, going straight to permanent deletion.
2. Possible Reasons Files Are Not Going to the Recycle Bin
2.1 File Size Exceeds the Recycle Bin’s Limit
The Recycle Bin has a storage limit based on a percentage of the drive size. If the deleted file is too large, it might bypass the Recycle Bin. Windows prompts a warning that the file will be permanently deleted if this happens, but you can adjust the storage limit to accommodate larger files.
2.2 Shift + Delete Shortcut
When you delete a file using the Shift + Delete keyboard shortcut, it bypasses the Recycle Bin and is permanently deleted. If you’re used to using this shortcut, this might explain why files aren’t going to the Recycle Bin.
2.3 Recycle Bin Settings
Incorrect settings can cause files to bypass the Recycle Bin. For example, if the “Don’t move files to the Recycle Bin. Remove files immediately when deleted” option is selected, files will be permanently deleted rather than sent to the Recycle Bin.
2.4 Insufficient Disk Space
When a drive has insufficient space, Windows may automatically bypass the Recycle Bin to free up space, permanently deleting the files.
2.5 Third-Party Software
Some third-party file management or antivirus software can alter the behavior of file deletion, causing files to bypass the Recycle Bin.
2.6 Corrupted Recycle Bin
The Recycle Bin itself can become corrupted due to system errors or improper shutdowns, leading to abnormal behavior, including not storing deleted files.
3. Diagnosing and Fixing the Issue
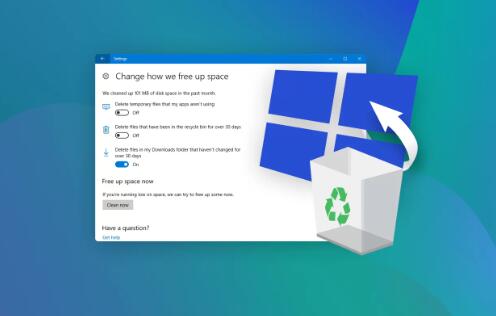
3.1 Check Recycle Bin Settings
Ensure that the settings in the Recycle Bin properties are correctly configured:
Right-click on the Recycle Bin icon on the desktop.
Select “Properties.”
Check that the option “Don’t move files to the Recycle Bin” is unchecked.
Adjust the maximum size of the Recycle Bin if needed.
Click “Apply” and “OK.”
3.2 Adjust Disk Space
Make sure there is enough free space on the drive:
Open “File Explorer.”
Right-click on the drive where the files are being deleted from and select “Properties.”
Check the available space. If it’s low, consider deleting unnecessary files or moving them to another drive.
3.3 Repair Corrupted Recycle Bin
To repair a corrupted Recycle Bin:
Open “Command Prompt” as an administrator.
Type the following command and press Enter:
bash
复制代码
rd /s /q C:\$Recycle.bin
This command deletes the Recycle Bin folder, and Windows will recreate it. After running the command, restart your computer.
3.4 Disable Third-Party Software
If you suspect third-party software is causing the issue, try disabling or uninstalling the software and see if the problem persists.
3.5 Use Group Policy Editor
If you are using Windows 10 Pro or Enterprise, you can use the Group Policy Editor to manage Recycle Bin behavior:
Press Win + R, type gpedit.msc, and press Enter.
Navigate to “User Configuration” > “Administrative Templates” > “Windows Components” > “File Explorer.”
Look for “Do not move deleted files to the Recycle Bin” and ensure it’s set to “Not Configured” or “Disabled.”
3.6 Check Registry Settings
You can also check the registry settings:
Press Win + R, type regedit, and press Enter.
Navigate to HKEY_CURRENT_USER\Software\Microsoft\Windows\CurrentVersion\Policies\Explorer.
Look for a key named “NoRecycleFiles.” If it exists and is set to 1. change it to 0 or delete the key.
4. Prevention Strategies
4.1 Regularly Check Recycle Bin Settings
Periodically check the settings to ensure they haven’t changed, especially after system updates or installing new software.
4.2 Avoid Shift + Delete
Be cautious with the Shift + Delete shortcut if you want to keep files in the Recycle Bin temporarily.
4.3 Use Data Recovery Software
Consider using reliable data recovery software like Panda Assistant if files are permanently deleted and need to be recovered.
4.4 Backup Important Files
Regular backups can prevent data loss if files are accidentally deleted. Windows 10 offers built-in backup solutions like File History, which you can enable to back up files automatically.
About us and this blog
Panda Assistant is built on the latest data recovery algorithms, ensuring that no file is too damaged, too lost, or too corrupted to be recovered.
Request a free quote
We believe that data recovery shouldn’t be a daunting task. That’s why we’ve designed Panda Assistant to be as easy to use as it is powerful. With a few clicks, you can initiate a scan, preview recoverable files, and restore your data all within a matter of minutes.
Subscribe to our newsletter!
More from our blog
See all posts


Recent Posts
- Hard disk bad block repair 2025-04-11
- Truenas will scrub repair disk 2025-04-11
- Hard disk repair dubai 2025-04-11