 Try lt Free
 Recovery success rate of up to
1. Preparation
Backup Your Data: Before you begin, ensure you have backed up all important data from your disk. Erasing the disk will delete all data on it.
Create Ubuntu Installation Media: You’ll need a USB flash drive or DVD to install Ubuntu. You can create a bootable installation media using tools like Rufus (for Windows) or Startup Disk Creator (for Linux).
2. Download Ubuntu
Go to the Ubuntu website and download the latest version of Ubuntu Desktop. Choose the version that suits your needs (e.g., LTS for Long-Term Support or the latest release).
3. Create Bootable Media
For USB Drive:
Download and install Rufus or another similar tool.
Insert your USB drive into your computer.
Open Rufus, select your USB drive, and choose the Ubuntu ISO file you downloaded.
Click “Start” and wait for the process to complete.
For DVD:
Use a DVD burning tool like ImgBurn or built-in software in your operating system.
Select the Ubuntu ISO file and burn it to the DVD.
4. Boot from Installation Media
Insert the bootable USB drive or DVD into your computer.
Restart your computer and enter the BIOS/UEFI settings (usually by pressing a key such as F2. F12. Del, or Esc during startup).
Change the boot order to prioritize the USB drive or DVD.
Save the changes and exit the BIOS/UEFI settings.
5. Start Ubuntu Installation
When your computer boots from the USB drive or DVD, you’ll see the Ubuntu welcome screen.
Select “Try Ubuntu” to boot into a live session or “Install Ubuntu” to start the installation process directly.
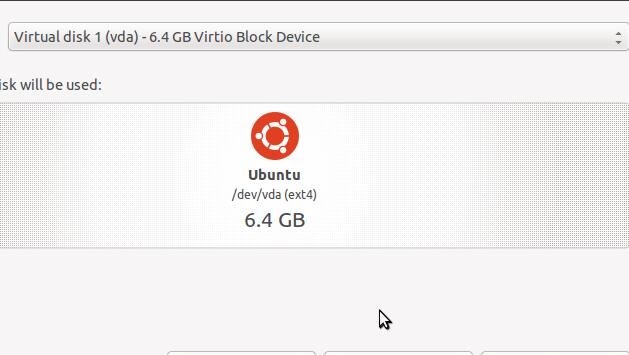
6. Erase Disk
If you selected “Install Ubuntu”, you’ll be guided through the installation process.
When prompted to choose an installation type, select “Erase disk and install Ubuntu”.
You may be asked to confirm your choice. This will delete all data on the disk and create new partitions for Ubuntu.
Proceed with the installation by following the on-screen instructions.
7. Configure Installation
Select Your Language: Choose your preferred language and click “Continue”.
Keyboard Layout: Select your keyboard layout and click “Continue”.
Updates and Other Software: Choose whether to install updates and third-party software during the installation. For a clean installation, you might skip this step and update later.
Installation Type: Ensure “Erase disk and install Ubuntu” is selected.
Select Installation Drive: Choose the drive where you want to install Ubuntu. If you have multiple drives, make sure you select the correct one.
Time Zone: Select your time zone and click “Continue”.
User Information: Enter your name, computer name, username, and password. This information will be used to set up your account on Ubuntu.
8. Complete Installation
Once all options are configured, click “Install Now” to begin the installation process.
The installer will copy files and set up Ubuntu on your disk. This process may take some time.
Once the installation is complete, you’ll be prompted to restart your computer.
9. Post-Installation
Remove the installation media (USB drive or DVD) when prompted.
Your computer will reboot and load Ubuntu.
Log in with the username and password you created during installation.
10. Update and Configure Ubuntu
After logging in, it’s a good idea to update your system. Open the Terminal by pressing Ctrl + Alt + T and run the following commands:
sudo apt update sudo apt upgrade
Install any additional software you need through the Ubuntu Software Center or Terminal.
Note: If you encounter any issues during installation, refer to the Ubuntu documentation or seek help from the Ubuntu community forums.
About us and this blog
Panda Assistant is built on the latest data recovery algorithms, ensuring that no file is too damaged, too lost, or too corrupted to be recovered.
Request a free quote
We believe that data recovery shouldn’t be a daunting task. That’s why we’ve designed Panda Assistant to be as easy to use as it is powerful. With a few clicks, you can initiate a scan, preview recoverable files, and restore your data all within a matter of minutes.
Subscribe to our newsletter!
More from our blog
See all posts


Recent Posts
- Windows was unable to complete formatting 2025-04-17
- How to format a drive in windows? 2025-04-17
- How to format nvme drive windows 10 2025-04-17